Avail
Avail is a Web3 infrastructure layer that allows modular execution layers to scale and interoperate in a trust minimized way.
This guide walks you through deploying Avail Validator Nodes Powered by NodeOps.
Prerequisites
- EVM-compatible wallet
- Sufficient funds or credits for your Node subscription
Deploy Avail Validator Nodes with NodeOps Console
Checker Nodes
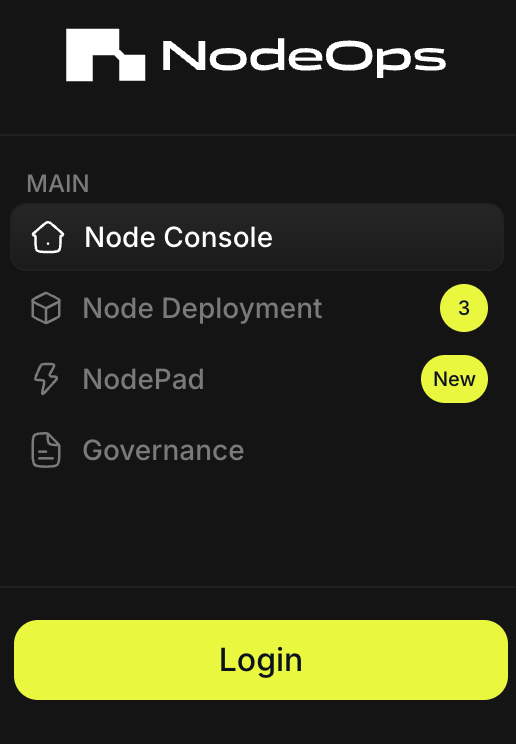
Step 1: Connect with the Console
- From the Console, sign up or log in using the Log In button; bottom left of the Console.
Show me
- Choose your sign in method:
- Wallet/Email/Social
Show me sign in methods
Use the tabs to learn more:
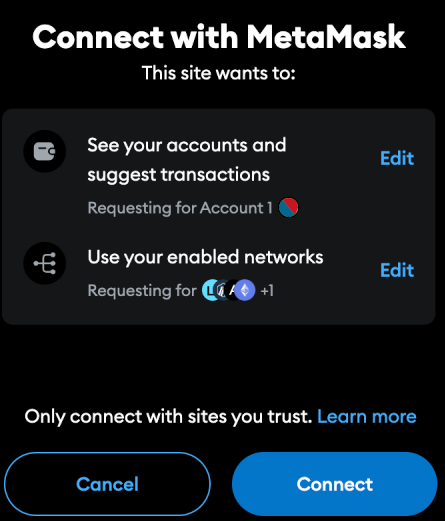
- Wallet
To sign in with an EVM-compatible wallet, you must approve the connection request in your Wallet. Click Connect and Confirm the request.
Show me
Sign in with Email and connect a wallet later.
Show me
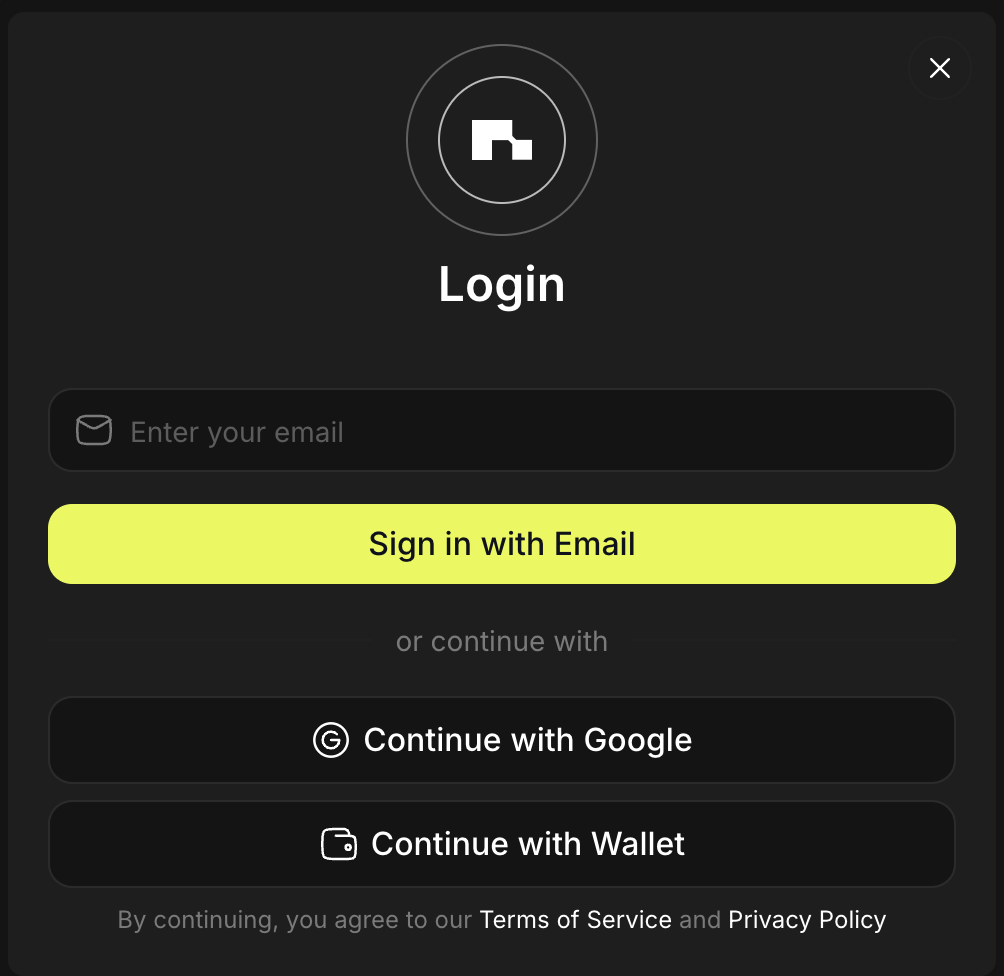
Sign in with Google and connect a wallet later.
Show me
Step 2: Select your Protocol and Node
Navigate to Node Deployment on the left side menu and select Avail.
Step 3: Set up your Node subscription
Pay using your favorite stables on your preferred chains. Once the Payment is successful, you will automatically be redirected to the Dashboard.
Step 4: Verify your deployment
- Wait for a couple of minutes for the Deployment status to change from Pending to Running.
- Check your logs.
Once the status is Running, the Logs will automatically display the steps, to validate if your Node is working fine, you should see logs something like this
Step 5: Verify deployment at Avail Telemetry
Check telemetry.avail.tools and search for your namespace showcasing the sync status of the Node. The synchronization approximately takes 18-24h_
Step 6: Register and create stash & a controller account
Learn more about this from the Avail docs.
To register your Node as an active validator, bond your tokens to the respective Node:
-
Navigate to the Goldberg network explorer at goldberg.avail.tools
-
Create a
stashand acontrolleraccount. Thestashaccount should ideally be a cold wallet, while thecontrollercan be a hot wallet.
- The controller key is responsible for managing staking activities and executing transactions, including the payment of transaction fees.
- The stash key primarily safeguards your funds and should ideally be stored in a cold wallet or kept offline. It is not recommended to use the stash key for routine account activities like submitting extrinsics.
- Create a Controller Account.
REMEMBER TO STORE YOUR MNEMONICS/KEYS SAFELY
Step 7: Bond your funds
Follow the Avail docs to bond your funds
Go To Goldberg Explorer -> Network -> Staking
Click on Stash to proceed with Bonding.
Step 8: Add a session key
-
Head over to NodeOps Console, go to your Node and fetch the session key
-
Copy and paste the session key in the session key section.
Step 9: Register as a validator
- Register as a validator by Clicking on Validate on the Staking tab.
-
Set your validator commission, enter your password & Start the Validation
Step 10: (Optional) Verify & monitor your validator on the explorer
To verify if your validator is running properly, verify the validator status, and monitor the dashboard logs in the Console.
FAQ
- What's the subscription cost?
| Duration (Months) | 1–10 Keys $ (per m) cost |
|---|---|
| 1 | (7.50) 7.50 |
| 3 | (7.13) 21.38 |
| 6 | (6.75) 40.50 |
| 12 | (6.00) 72.00 |
- Do I need to upgrade my Node/s on my own?
No, NodeOps automates deployments and upgrades.
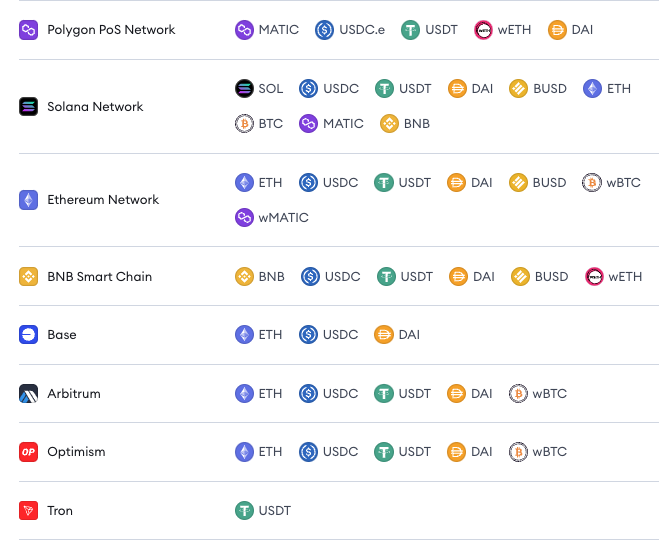
- How do I pay for subscriptions? Pay with fiat, stables, or tokens via our payment partner, Copperx:
Show me accepted stables and tokens
What next?
- Reach out on Discord if you need further assistance
Learn more about:
- Validator staking with Avail.
- The various types of Avail Nodes
- Getting Avail tokens from their faucet