Run no-code Nodes
Introduction
This page guides you through the basics of NodeOps Console, NodeOp's multichain, easy-to-use platform that enables Web3 protocols and blockchains to achieve their node distribution needs by incentivizing you, the Node runners.
NodeOps Console is so simple that anyone can run a Node and earn. No code needed; create a subscription and we do all the hard work for you.
Prerequisites
- EVM-compatible wallet
- Sufficient funds or promo code
- Specific Protocols may have additional requirements
Sign up
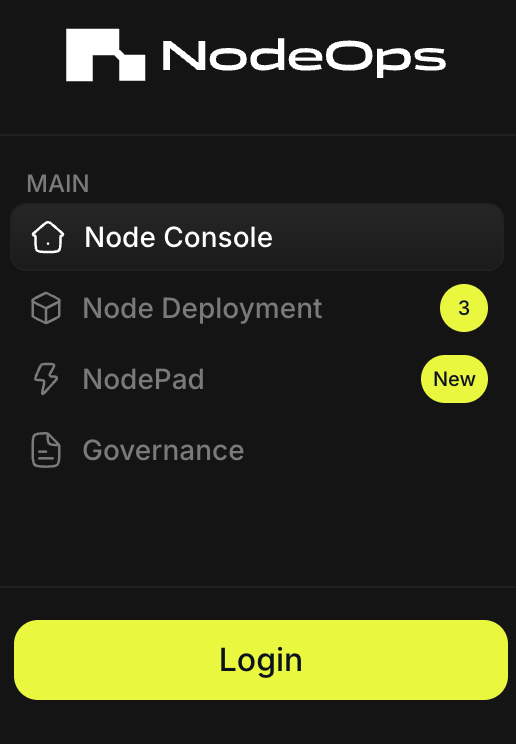
Step 1: Connect with the Console
- From the Console, sign up or log in using the Log In button; bottom left of the Console.
Show me
- Choose your sign in method:
- Wallet/Email/Social
Show me sign in methods
Use the tabs to learn more:
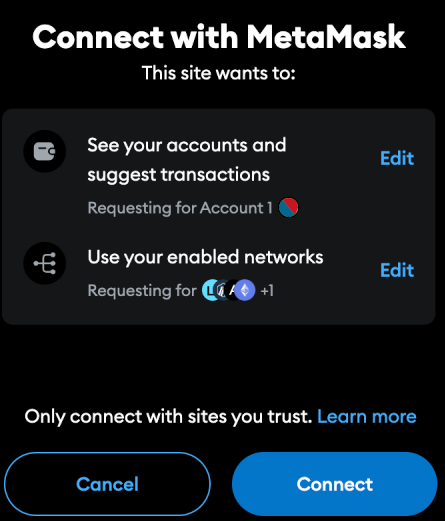
- Wallet
To sign in with an EVM-compatible wallet, you must approve the connection request in your Wallet. Click Connect and Confirm the request.
Show me
Sign in with Email and connect a wallet later.
Show me
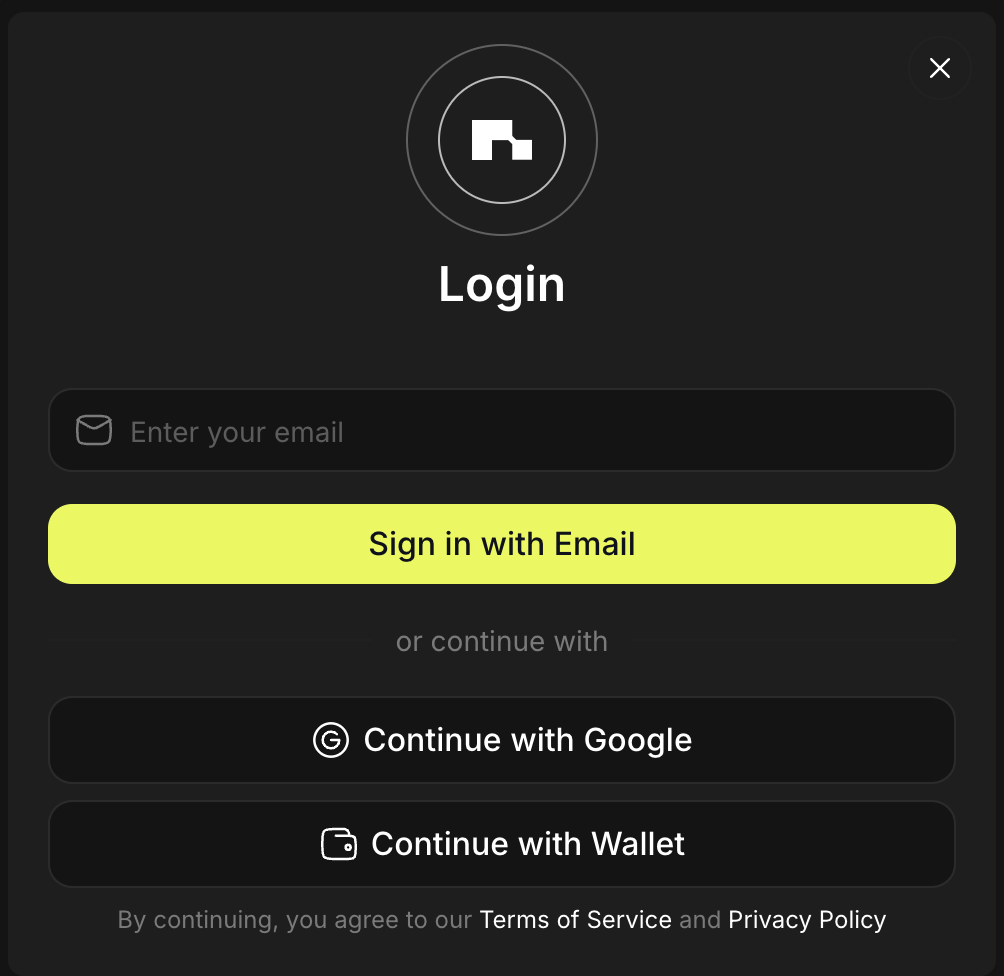
Sign in with Google and connect a wallet later.
Show me
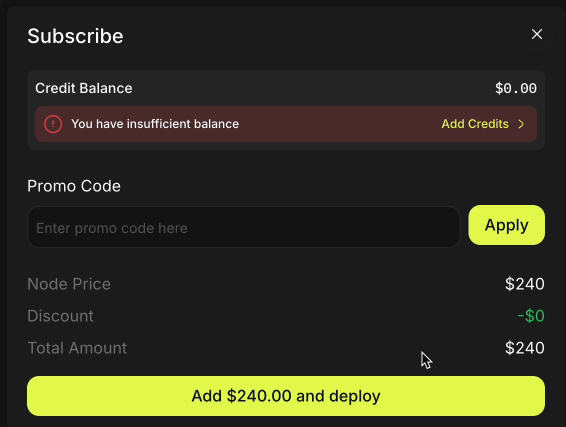
Step 2: Top up credits
If you have a Promo Code, proceed directly to Step 3.
Select your payment source from the tabs:
- Pay with stables or tokens
- Pay with $NODE
- Redeem Promo Code
You may pay for subscriptions and services via our payment partner using:
- Debit or credit card
- Stables and tokens on supported chains
Supported stable and token payment options
| Network | USDC | USDT | USDC.e | BUSD | ETH | POL | SOL | BNB | WBTC | DAI |
|---|---|---|---|---|---|---|---|---|---|---|
| SOL Mainnet | ☑️ | ☑️ | ☑️ | ☑️ | ☑️ | ☑️ | ☑️ | ☑️ | ☑️ | ☑️ |
| Polygon | ☑️ | ☑️ | ☑️ | ☑️ | ||||||
| Arbitrum | ☑️ | ☑️ | ☑️ | ☑️ | ☑️ | |||||
| Ethereum Mainnet | ☑️ | ☑️ | ||||||||
| BSC Mainnet | ☑️ |
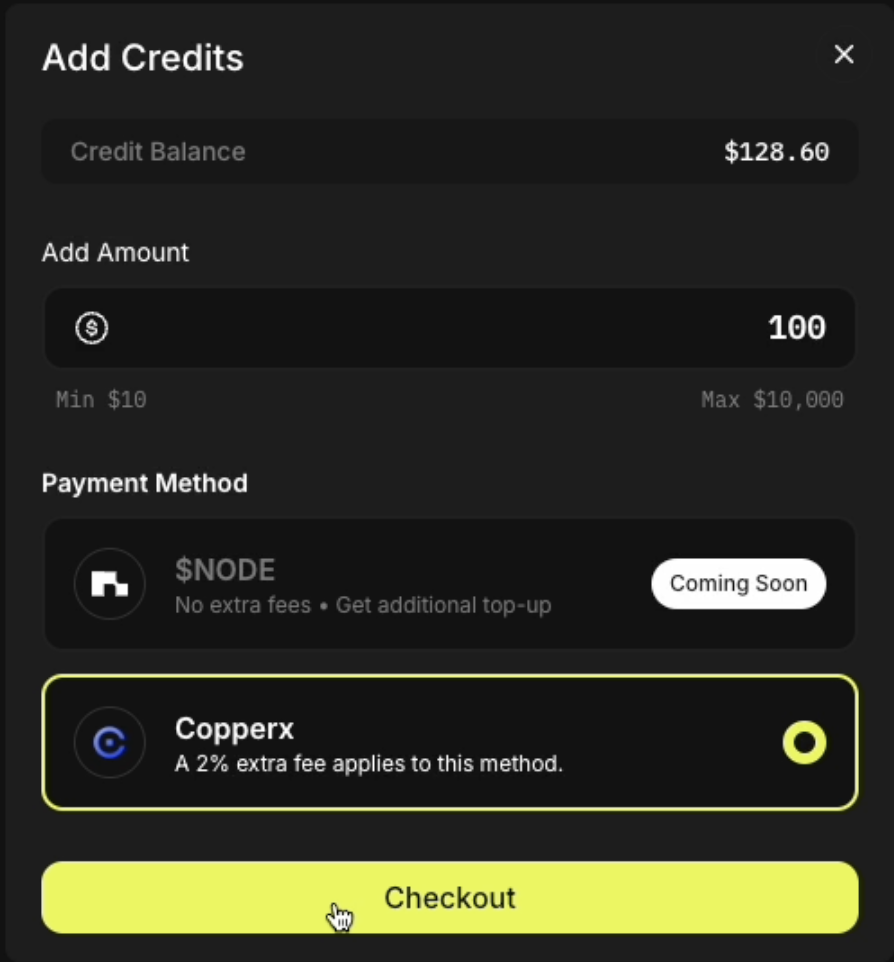
Step 1. Enter the payment flow
- Add credits
- Subscribe
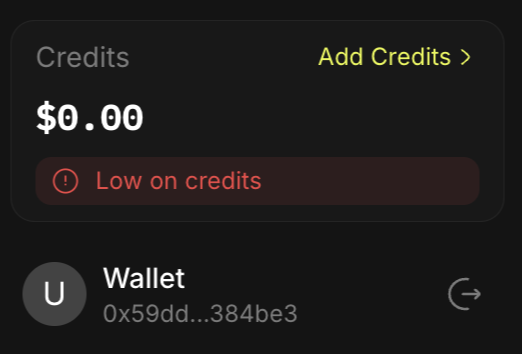
- Logged in to Console, or Marketplace, click Add Credits in the bottom left of the dashboard.
Show me
- Logged in to Console, or Marketplace, subsribe for a product or service and follow the payment flow.
Show me
- Select Copperx and click Checkout
Show me
Step 2: Pay
Choose to pay with tokens or fiat, use the tabs below:
- Tokens
- Fiat
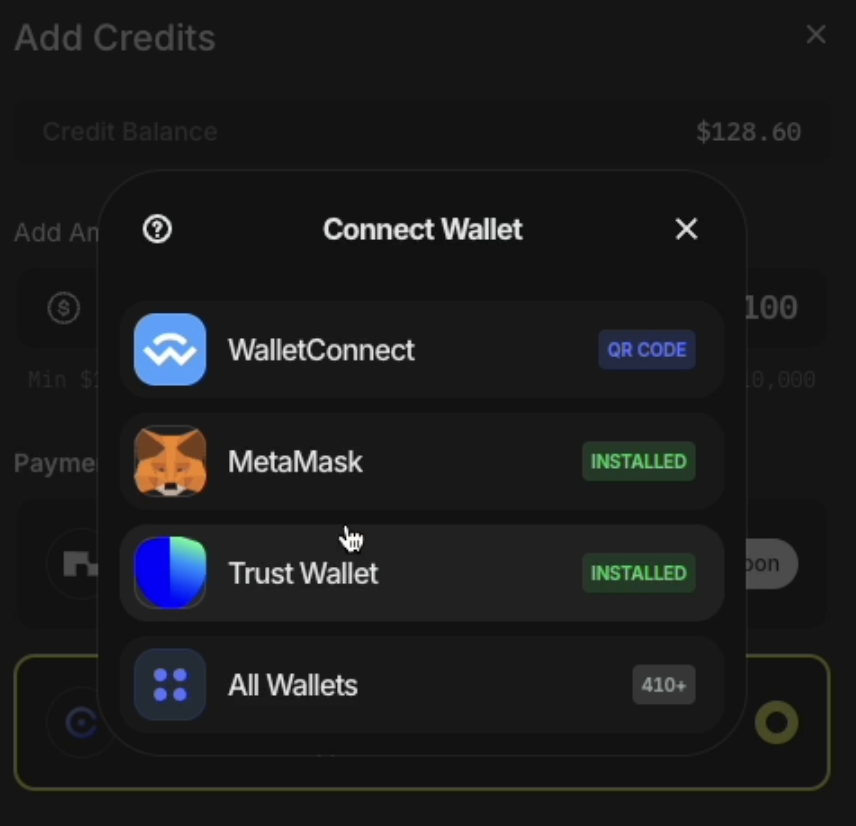
- Select the wallet containing your funds.
Show me
- Continue with payment.
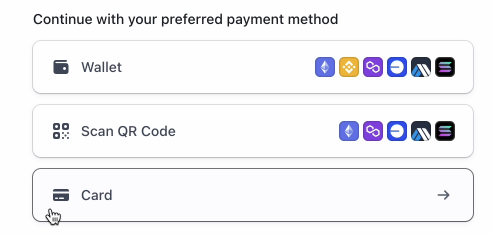
2.1 Choose either:
- Wallet
- Scan QR Code
This option provides an address that you may copy directly into the "To" address in your EVM-compatible browser wallet, or you can use a mobile wallet to scan the QR to pickup that address.
Show me
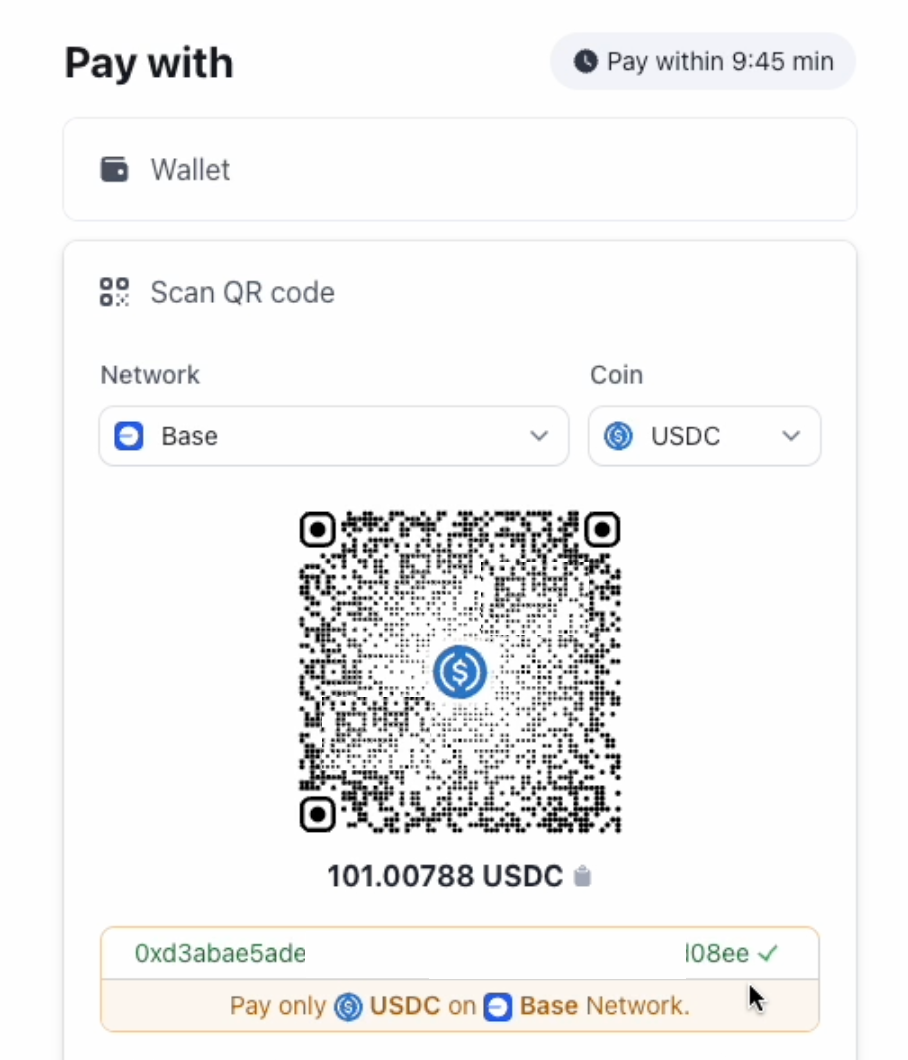
2.2 Select the network your stables or tokens reside on.
2.3 Enter the amount you wish to pay, and confirm the transaction.
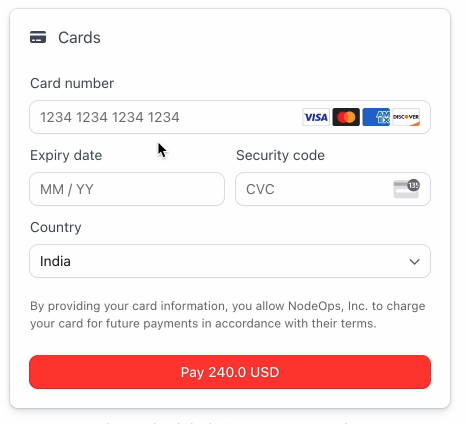
2.1 Select Card.
Show me
2.2 Enter your card details for our payment partner to process.
Show me
- Complete the payment
Congratulations you are ready to use your favorite NodeOps services.
- Click Add Credits at the bottom left of the Console.
Show me
-
Select $NODE as the payment method.
-
Enter the USD amount of $NODE that you wish to convert to credits.
-
Click Checkout.
-
Confirm the transaction in your wallet.
There are no L1 transaction fees to pay.
If you have a Promo to redeem, you can use this when you pay to deploy your Node. No need to topup, you're ready for Step 3.
Deploy Nodes
Step 3: Choose your deployment type
There are 3 deployment options, for inexperienced Node Runners, we recommend using the default, Auto-assign mode, alternatively, use the tabs to learn about the 3 deployment options:
- Auto-assign
- Profile Preference
- Custom
Auto-assign is the default and the most straightforward way to deploy nodes in the NodeOps Network. With Auto-assign, NodeOps selects the best available Provider for your deployment.
Show me how to deploy in Auto-assign mode.
Node Runners can set their preferred Providers and machines for all their deployments. You can do this using the Advanced Setting option under their Profile.
Watch how to deploy in Profile Preference mode.
Node Runners can also choose a specific Provider machine for a particular node deployment and further customize the node using the Custom option.
Watch how to deploy in Custom mode.
Step 4: Pay for subscription
There are multiple ways to pay for a subscription, use the tabs to learn more:
- Pay with credits
- Pay at checkout
- Redeem Promo Code
Use your account credits.
Pay the exact amount via our payment partner, Copperx.
Redeem your Promo Code to pay, or partially pay, for your subscriptions.
You're now ready to choose which Protocol's Node you wish to run. Or stay here and learn about managing your Nodes and subscriptions.
Monitor Nodes
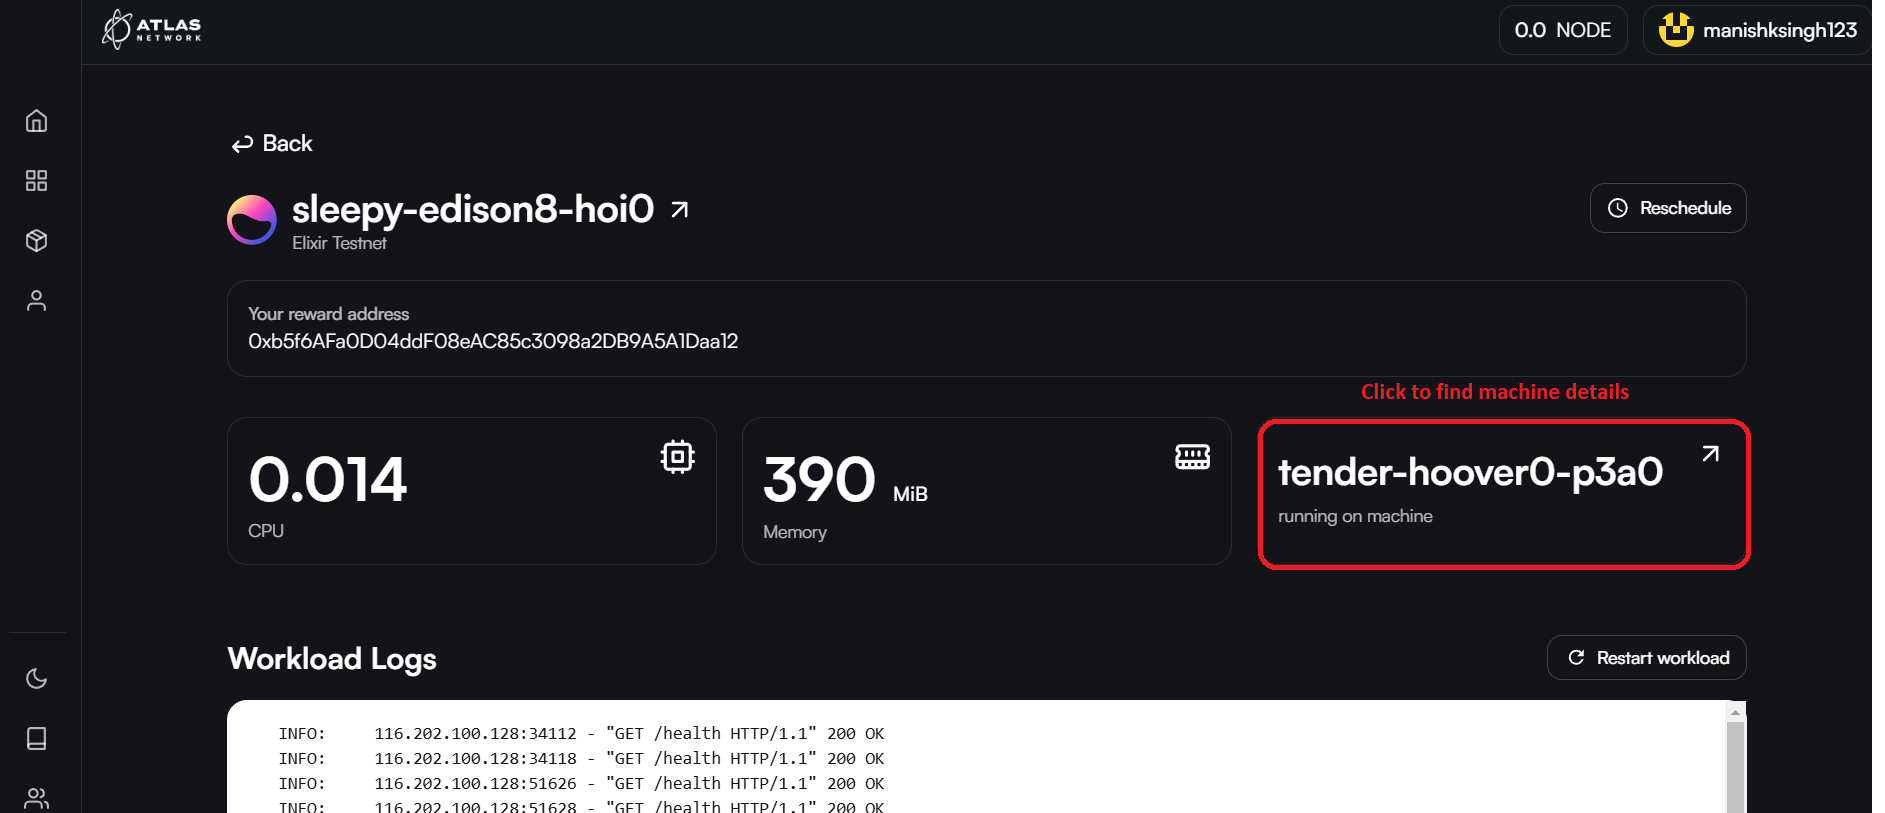
Once your Nodes are deployed, you can monitor them from My Nodes. Clicking on a Node pulls up a page with its details.
Inactive Node?
If a Node is inactive:
- Restart it on the same machine
- Or, reschedule it to run on a different machine using the Reschedule button.
Machine details
As a Node Runner, you can navigate to the machine of the Provider on which your node is deployed by clicking on the machine name.
Machine details shows the technical specifications of the machine along with the number of nodes (workloads) currently running on that machine.
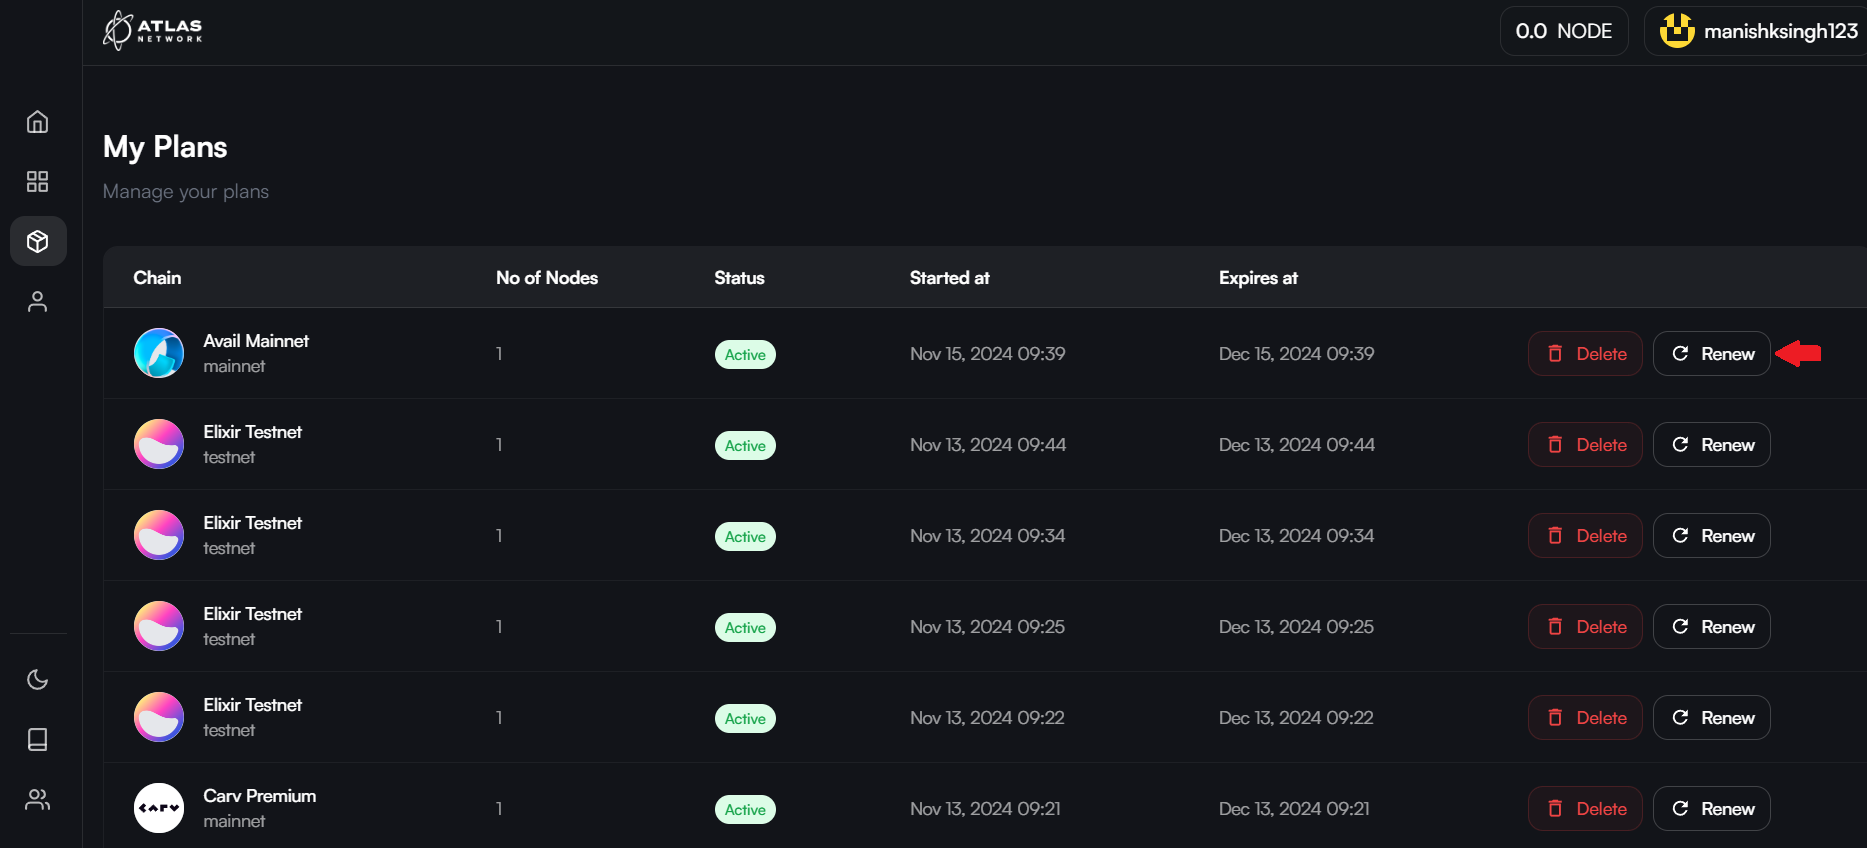
Renew subscription
Use the My Plans feature to look up your node subscriptions and renew these.
Gotchas
If you login with your email, this becomes your identifier and you can later connect your wallet. Should you login with your wallet and later with your email, you just created a second Console account.
What next?
-
Choose from our extensive ecosystem of supported Protocols and become a Node Runner today.
-
As part of the Proof of Concept for NodeOps Network, various partners have joined the testnet. This means that some of the incentivized quests require you to create an account in NodeOps Network, rather than NodeOps Console. Get started on testnet.
-
Running a Node is so simple that you can do it from a mobile, why not have a go?